As soon as I saw GW's new treeman kit, I just knew that it would make an absolutely fantastic alternative model for the Eldar's Avatar of Khaine. The old Avatar model, despite being quite a good model when released, is really showing its age compared to the newer items, and for a simple painting project, the Forgeworld model is a little more money than I can afford/spare. Conveniently, the model was released just before my birthday, so Mrs. G., being the superstar that she is, picked me up a kit.
I may as well write my thoughts on the kit as I go. I know the design is a little marmite (for those that don't know the reference, you either love it or hate it), as GW have obviously tried to unify the design with the Dryads. For me, although as usual they've turned things up to 11 which has spoiled things a little, I do quite like the look of the model, and it would be no bother really to tone things down if you were using it.
As far as constructing the model goes, its a fantastically clever kit, with a vast array of options (almost too many in some cases). As an example, the torso: it has an upper section with a common front and back, but there are 3 types of shoulder, a hip section which is universal, but then 3 different midsections to join the upper torso to hip, and 3 neck options (all of which are completely interchangeable) - all told that's 27 different ways to build just the torso section of the model. Add to this 3 options for each shoulder, elbow, knee and ankle, 3 heads, 3 loincloths and 3 different weapons and there's potentially 4.8 million different combinations of how to build the model!
The downside of this is that it can be extremely difficult to know which combinations will be compatible if you don't follow the three options included in the instructions. I spent quite a lot of time with the blue-tack trialling combinations to get the pose I liked, and you have to be careful as some combinations just won't work
On to my build, the main action other than working out the pose I liked, was removing all the leaves and branches so that it looks more like an avatar. It wasn't a particularly difficult task, just very time consuming, and not the most friendly to my fingertips as I'd installed a new blade in my knife for the job. Here's the treeman about 60% done.
 He's got the main pose down, and the arms attached. I've magentised the head and the weapon arm as I'd like to be able to run him with a spear as well just because I think it'll look cool. This one is using the Durthu head, which I really like for the damage done around the eye. I'm less pleased with the "hair" on this head, and might cut it back a bit more, but I'm wary as I don't want the head to look bald either.
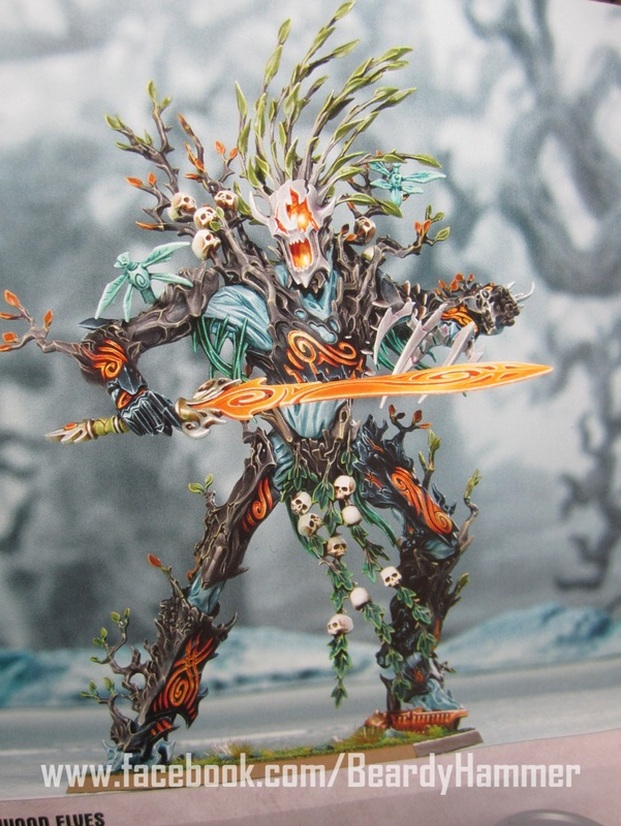
Here's the finished model this morning.
 You can see he's got the other head on (this one normally has a big beard, which was probably the most difficult part of the whole model to remove), but I really like the look of the growths on this head after removing the larger parts of it.
He's ready for some paint now, I'm going to have to have a bit of a think about how I'd like to paint him to achieve a similar effect to the GW models, I'd like the connector parts of the model to appear to be the visible molten heart of the Avatar, with the "woody" parts a much darker, solidified skin.
If anyone has any tips, or comments that you think might help, I'd love to hear them.
Cheers, Andrew
Here's the finished model this morning.
He's ready for some paint now, I'm going to have to have a bit of a think about how I'd like to paint him to achieve a similar effect to the GW models, I'd like the connector parts of the model to appear to be the visible molten heart of the Avatar, with the "woody" parts a much darker, solidified skin.
If anyone has any tips, or comments that you think might help, I'd love to hear them.
Cheers, Andrew

That is a great idea! Love the build and looking forward to seeing how it turns out!
ReplyDeleteCheers, I'm looking forward to paining it, and also dreading it as I know I've a strong idea in my head of how I'd like it to look, but don't know if I'm going to be up to painting it to that level. I'll just have to give it a go and see how it comes out I guess.
ReplyDeleteKool.
ReplyDelete