(No, I'm not posting on Julafton, this just happens to be scheduled for today,
Merry Christmas, God Jul, and assorted Winter Solstice greetings to you all.)
In the time its taken me to change the paintscheme on these guys, the Tau have had 2 new codexes, its a testament (if you want) to the speed of the current GW release cycle, or more likely, how slow my painting is these days.
A simple white paintscheme with blue accents. The guy below is meant to be a Cadre Fireblade stand in or similar, hence using a lot more blue in his scheme.
Not the most groundbreaking post, but here's the tomb blades I started about 6 months ago when the new Necron codex came out. They are a pain to build, extremely intricate with lots of fiddly little bits that have to be put together in a very precise order. They do paint up nice and quickly and easily, and I've found them to be surprisingly useful on the tabletop as well, a nuisance unit and good for grabbing objectives either late in the game, or as you pull the cards when playing Maelstrom.
Standard paintscheme as with all my Necrons, and as ever, I've magnetised the weapons so if I want to mix up the options.
put the pieces in an electric fan oven at set to 50 degrees C (120F) to pre-warm them.
oven started cold, and I only left them in for 10 minutes throughout the process I am describing. I would not do this with resin or thin plastic bits (swords etc).
I took each piece out, sprayed it, and put it back in again.
(Gas oven would be a bad idea: water is a combustion product, so they are intrinsically more humid)
The longer version.
I had sprayed the guns for my Crimson Death (which are magnetised) with dullcote a while back. It was cold and humid, and I got the dreaded frosting. This was a bit of a downer, and it has taken a while for me to get the drive back to tackle the job.
The guns are mostly black with green gems. I repainted over the black, as it was quick (I had just painted black and edge highlighted), and the frosting stood out over the black worse than the green. My gems have a 5 step highlighting process that I could not be bothered to do again.
The black came out looking shiny in places and matte in others, so really needed matte varnish again.
Warming and spraying again worked well. It made the black matte, and on the gems that I had not repainted, it actually removed the frosting. I can only assume the solvent in the dullcote re-dissolved the frosted layer and this time dried properly because is was warm and the humidity was low. I imagine that if the original frosted layer had been too thick, this would have been less successful.
These gems were frosted, and this is them after the fix.
A ways back in July, while in Japan, I bought a model of a Gundam, and finally I can show you the build. Kind of apt with the current re-launch of the Tau and all.
Firstly, despite everyone touting GW as the best model builders in the world etc. etc., they've definitely got a thing or two to learn from BanDai, the kit is staggering in its design and complexity.
Take a look at the sprue below. You may notice that the plastic has two tones of grey, that's because they are able to cast the sprue in at least two stages to produce pieces that are already articulated, with extremely complex joints and sliding parts, some actually cast within other parts to move like pistons.
The whole kit is press-fit, I didn't need a drop of glue, and the only time I used any tools was to remove the parts from the sprue, clean the odd mould line (far, far neater casting that GW), and to cut a few pieces of piping to length that were inserted into joints to represent hydraulics.
The kit was essentially two kits in one. The first was the fully articulated skeleton of the model that you can see below. Every joint was articulated with a very wide range of motion. In fact, as I continued to build the model I discovered more and more points of flexure and the number of poses that you could build is mind-blowing.
Once the skeleton is built, you add the armour panels to make up the final model. The different parts are cast in their appropriate colours so you don't even need to paint, and as before, every single piece is press-fit, highly secure, and there are individual pieces for every sub-part of the skeleton so none of the articulation is lost with the build.
The final result is absolutely brilliant, with multiple hands that can be swapped to allow different weapons to be gripped, all sorts of moving parts, and so much possibility.
Best of all, since returning, I've discovered that you can buy them on Amazon and other online retailers, so this guy might just be getting a friend sometime in the future.
Particularly for 40k, it makes sense to paint a batch at once. Probably a squad, squadron or formation.
It can start to feel like a drag, and standards may slip. Modelling and painting an individual mini is a way to experiment with new time-consuming techniques without it turning into a hassle.
Here's a one. After a particularly brutal defeat (using my Iron Knights against my friend's Death Guard), I rewarded my opponent with an Iron Knight zombie for his horde. I did not have any spare legs, but then zombies don't need legs.
There's greenstuff guts and mushrooms, UHU mixed with paint to give glue-string gore, and some weathering experiments. Kudos to the first person to identify the source of the head.
Open camera is an Android app that is way better than the stock google camera app, when it comes to photographing minis.
One problem with the google app is that it will not focus. The auto focus keeps changing, so you just think it's sharp, then as you take the picture it blurs again. Open camera has a focus lock.
Under the dot menu, there is a padlock. Tap that to lock the focus. The camera will focus where you tap on the screen. Apart from that, it will not change. You can make fine adjustments to the focus by moving the camera closer or further from the subject.
Its a good idea to have an uncluttered background. A white sheet of paper curved up the wall is popular. The auto-exposure will then give you a dark image. The model can be almost silhouetted at worst, a little muddy looking at best. The exposure needs compensating for the bright background. In Open Camera the brightness setting is right on the main screen. It will then use it's standard algorithm for guessing the exposure, and brighten it up from that baseline. Then you can see tonal variation on the model, not the tonal variation on the paper.
If adjusting the exposure seems like too much hassle, then use a mid-grey background.
A ways back in the dim and distant past I showed you all how I'd converted up the Storm Raven to make it look a little less goofy (in my opinion of course). I've even stuck to the same naming convention for this post! Well with the release of the new Space Marines codex and all the formation-y goodness in it, who could resist the lure of a Storm Wing. All I needed was the little addition of a pair of Storm Talons.
Of course, what had been stopping me buying Storm Talons before was an equal dislike of the stock model as sold by GW. Just like the Storm Raven, I found it a little too blocky, too deep for its profile, and with a few design choices that I just couldn't make myself like no matter how hard I tried.
Thank you Internet (I'm pretty sure I'm not the first to utter those words ;), there seem to be plenty of others out there that feel the same way and have made some amazing conversions of the Storm Talon.
Excommunicate Traitoris has made a fantastic and subtle conversion, and one that I ultimately took the most inspiration from.
This and this conversion really went to town, and retained the rotation of the under-slung assault cannon.
There are a couple of conversions that really stand out though for their inventiveness:
This A-10 Warthog conversion is inspired and if it didn't require the purchase of Storm Raven wings and a Punisher Autocannon from somewhere I would have been copying this heavily.
Anyway, I'm obviously getting lazy in my old age as I wanted to fix up the Talon with as little work as possible. Its not a perfect conversion, if I had the money and time for lots of extra parts then I'd be doing more, but this is a pretty quick and easy fix (as long as you don't mind that the Assault Cannons no longer rotate.
All the images should be nice and big if you need when you click on them.
First step is to make the Assault Cannons, add the skid plate from the very bottom of the standard setup, and remove the square tab from the underside of the body. It's right in the centre of the circular mount for the underslung turret, you should be able to make out where it was in the image.
Join the Assault Cannons together, add the skid plate, then glue directly onto the circular section of the underside of the body (where the little tab used to be).
I've also constructed the rest of the body so you can see the new silhouette, much more streamlined compared to the image below it of the standard build.
Engine pods. I like to mount the wings so they are tapered from the front, I think they just look a bit better that way.
I also mounted the rocket-pods under the wings, to the lower parts of the engine pods. This required a very small amount of trimming to get them to fit nicely, but it was just a little bit, and just to make the join that little bit nicer.
That's it, all the work I had to do. Below are a few shots of the completed model so you can see its final silhouette. I'm pretty pleased. It still has that compact, punchy feel of the original model that goes so well with its rules, but has removed the worst offenders for silly modelling choices.
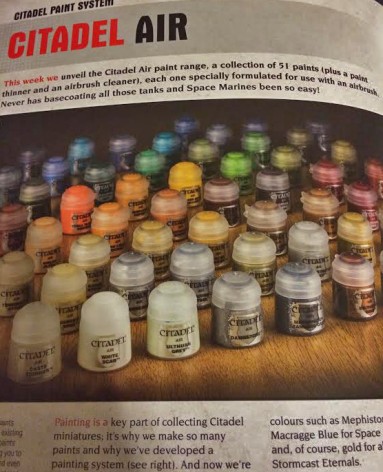
The new Forgeworld and GW airbrush paint comes in normal pots. They use the same pots as for their standard bristle stick range.
Many commented that they prefer dropper bottles, like Vallejo.
Plenty of others are fine with pots, and use pipettes to get small amounts of paint out. Indeed, they like the pots because they can get the paint back in easily. Though it is also possible to get the dropper top off the Vallejo bottle to get the paint back in, it is a little messy. (I heard they have different bottle designs, and with some it may not be possible).
As usual, I do it differently. I got a bunch of empty dropper bottles (where the dropper end is a little easier to remove than the Vallejo bottles). I mix my own, starting mostly from Vallejo Model Air.
Using a milligram balance and making up at least 5ml of paint at a time is more precise than using a dropper. I converted one of the lids to a funnel. I add the extra water last to rinse the spare paint from the funnel.
Edge highlighting is a basic technique, but it's one I think I have got better at in the last year or so.
The arrows point out a few regions where I have put bright white straight onto pure black. This is something I would have avoided before. The lines need to be very thin. I think I got away with it here.
Use a fine brush. I use Winsor and Newton 000 for the finest edge highlights.
Use retarder. This slows the paints drying time. Without it I can't move fast enough to get the paint onto the model before it dries on the brush. I use Vallejo retarder. The bottle says no more than 5% retarder. I have got up to 14% and it still cures, but this may depend on the paint you are using.
Prep the brush. Wet it first. wipe enough water off that there is no longer a drop of water on the end of the brush separating the bristles. Get a tiny amount of paint on the brush and wipe off the excess.
Dont do this
The tip will fall one side of the edge, and then the other. You will not get a straight line.
Do this
Use part of the brush just back from the tip.
Drag with the brush. Try not to stab with it. For some hard to reach areas this may be impossible. It's a good reason to assemble some parts after painting.
The ideal angle is 5-30 degrees.
I like the strength of the edge highlight to vary. I think trying to get it completely uniform is difficult and does not look good. I usually try to get the corners a bit brighter. So I first touch the newly loaded brush near a corner, and then wipe the paint toward the corner.
The next stroke starts further back, but again wipes towards the corner.
And so on.
You should end up with a subtle graduation of paint along the edge. I have heard that some prefer to try to hit the edge highlights with one stroke, but I got better results this way.
The only other detail about the technique is to suggest that doing several steps of edge highlighting with brighter colours is a good idea, particularly for large surfaces. Let me know what I missed, and how you do your edges in the comments.
In which I will show how to make alien egg sacs. I put these on a mysterious objective marker. Should also be handy for terrain or Tyranid bases.
Start with a bag of cheap popcorn kernels. Nothing fancy. You may need to wash with detergent.
I usually use oil, if I am planning to eat them. This will cause problems. I found that I could get them to pop by leaving the grill to get hot, then putting a tray in very close. A few should come out right.
Glue them to your base.
Dilute PVA to seal (also acts as a fine primer).
Paint.
I also added some UHU glue strings to complete the look.
It gets more complicated with things like rending. Still quite possible, but a bit more headscratching is required. Even trickier is shooting at vehicles. To do it properly you need to account for things like multiple immobilised results removing extra hull points.
There is a general method. You get a computer to roll the dice for you, lots of times and keep notes as it goes. This kind of thing is called a Monte Carlo Simulation. An early use was designing nuclear weapons in the second world war.
GNU Octave is a free (open source) maths scripting language. It's quite good for this sort of thing.
To get octave to roll 10 dice, you can do this.
> rolls=ceil(rand(1,10)*6) rolls =
2 6 2 4 2 2 3 3 5 4
rand gives a matrix of 1×10 numbers. They are between 0 and 1, so you have to multiply by 6. We only want whole numbers, and dice don't give zeros, so we round up. This is what ceil (ceiling) does. Next, how many hit? > passed=sum(rolls>=3) passed = 6
rolls>=3 returns a matrix of 0s and 1s. As we need 3+ to hit, it gives 1s to represent the hits. sum adds up the hits. Roll some more dice to wound.
You can combine this lot into a script file ("example.m") that repeats 100 times. n=100; totaldead=0; for i=1:n rolls=ceil(rand(1,10)*6); passed=sum(rolls>=3); rollstowound=ceil(rand(1,passed)*6); wounds=sum(rollstowound>=4); savingrolls=ceil(rand(1,wounds)*6); deathtoll=sum(savingrolls<3) totaldead=totaldead+deathtoll; end mean_dead=totaldead/n
Run this, and it spits out a number near 1.1. This is more hassle than first calculation, but when it gets more complicated simulations will beat the back of an envelope.
Note that I have put semicolons on the end of some lines. This suppresses output. So this script will just show you the deathtoll each loop, and the mean average at the end.
If there is some interest in the comments, I can expand this into a series of posts. Or, if I have time I can mathhammer on your behalf. My numbers are out of date now (vehicle damage table changed), but I did figure out the most cost effective way of taking down a Heldrake. At that time the highest probability of downing a heldrake in one per point spent that I could find was an Imperial Fist dev squad on a quad gun. The best value hull point stripper was a Stalker (you know, the Rhino chassis AA vehicle).
Fear not fellow bloggerites, I'm not dead, just very very busy.
To whit, I'm currently slumming it in Japan on a trip for work. This means two things:
I'm occupying my evenings when I'm stuck in my room by painting the final grunts for One Force
GUNDAM!!!
Yep, Japan is a bit of a hobby mecca (as long as you like Gundam that is). Even the local chain of electronics stores - Yamada Denki, has racks and racks of Gundam models for you to buy and build.
This song plays near continuously in the shop.
How the staff don't go postal by the end of the day I don't know.
They can even make selling fridges seem somewhat more exciting. I promise you there really are fridges underneath all those stickers.
Of course, the best place to go if you are anything like me is Akihabara - Tokyo's electronics town. Akihabara started life as a district where the Japanese and US military were selling off spare electronics parts after the second world war. Local students used to buy up the parts and make radios out of them to sell on and earn money to fund their studies. Ever since it has been synonymous with the sale of electronic goods. It really gained its reputation in the 80s and 90s when it was a one stop shop for tourists and locals alike to get the latest electronic gadgets at knock down prices, often long before they appeared in the local shops, and years before they reached the rest of the world.
Nowadays, with the growing prevalence of tech in the west, and apps on smartphones taking the place of many of the little gadgets that used to be sold, Akihabara has shifted its focus away from electronics (don't worry, you can still find loads) to other aspects of Japanese culture, namely manga and collectibles. If anything, its made the place even more colourful than before.
Even the graffiti and the bikes are more colourful in Akihabara.
Back to Yamada Denki and the Gundam - just look at how many kits there were, and this was only a single set of shelves, there were at least 4 full racks just of Gundam, and that's not even mentioning the other racks of models.
There was even a Unicorn Gundam - in unicorn mode no less.
Well I couldn't rightly pass up such an opportunity, so after a lot of umming and ahhing, I settled on the basic, original Gundam.
They come as two parts, a fully poseable inner skeleton of parts, and then the outer armour additions. Its all on separate sprues of appropriately coloured plastic so I won't even have to paint it, and there's a full set of transfers too. Awesome, can't wait to build this guy.
Mind you, should you ever feel the need to re-paint any of your Gundam, or build and paint any of the other models that were available, you wouldn't be short of supplies:
Or, if collectibles is more your thing, then there were plenty of places to pick up just about anything you could think of, and some things that I kind of wish they hadn't thought of. If you are ever in need of being weirded out, do a little research into the culture of doll ownership in Japan - let me just tell you that they are FULLY customisable and can be found in many of these shops.
Much cooler though was this guy...
... and this guy...
... if only!
Of course, since I mentioned I'd been working on One Force, I should at least show you where I'm at with painting them.
All that's left is shading and highlighting of the armour, battle damage and weathering and that'll be the last of the core 30 Tactical/Assault marines finished. It'll have only taken me three and a half years to reach that point - positively rapid pace.